Getting started
Genie runs as a desktop app, as a local web app, or as a browser-only web app that talks to a cloud project API. The assistant (the LLM agent that drives the browser) is available in the desktop app and in the local web app. This page covers prerequisites, installation, the three ways to run Genie, and a first session.
Prerequisites
| Requirement | Version or detail | Needed for |
|---|---|---|
| Node.js | 20 or later | Everything |
| pnpm | 9.15.4 (pinned in the root package.json packageManager field) | Installing and running the workspace |
| OpenAI Codex CLI | Installed locally and signed in to a model provider | The assistant only |
| macOS | Recommended for the desktop app | The desktop app (the packaging scripts build macOS dmg and zip files) |
The assistant runs on the OpenAI Codex CLI app-server: the Genie backend starts codex app-server and talks to it over JSON-RPC on standard input and output. Genie does not ship the CLI and does not hold model credentials. Install the Codex CLI with its own installer, run it once, and sign in so it can reach a model provider. The example sessions shown in these docs used a ChatGPT account sign-in.
The genome browser itself does not need the Codex CLI. Without it, you can still create projects, pick a genome, add tracks and export images; only the assistant chat is unavailable.
Install
Clone the repository and install dependencies from the genie/ folder:
cd genie
pnpm install
The workspace is a pnpm monorepo with apps under apps/, shared packages under packages/ and the AWS CDK app under infra/. See Monorepo layout for details.
Choose how to run Genie
| Option | Command | Assistant | Where project data lives |
|---|---|---|---|
| Desktop app | pnpm desktop:dev | On by default (needs the Codex CLI) | Electron's user-data folder, under session-data/ |
| Local web app with assistant | VITE_GENIE_ASSISTANT_ENABLED=true pnpm dev | On | genie/session-data/ |
| Browser-only (cloud mode) | pnpm dev:web-cloud | Off | The local cloud simulator's data folder |
Option A: desktop app
pnpm desktop:dev
This builds the desktop renderer, prepares backend resources and starts Electron. The app starts its own backend on 127.0.0.1 with a random free port and loads the interface from it, so nothing else needs to be running.
The desktop app looks for the Codex CLI in this order:
- The
GENIE_CODEX_COMMANDenvironment variable (an absolute path, or a command name resolved through your login shell). If it is set, no other location is checked. /opt/homebrew/bin/codex/usr/local/bin/codexcommand -v codexin a loginzshshell (zsh -lic).
If none of these finds an executable, the app still opens, with AI features disabled. A notice above the chat composer then reads "Codex CLI is not installed. AI features are unavailable until you install the Codex CLI."
GENIE_CODEX_COMMAND=/path/to/codex pnpm desktop:dev
Option B: local web app with the assistant
The local web app is the Vite frontend (apps/standalone) plus the Node backend (apps/backend). The assistant is off in web builds unless you turn it on with VITE_GENIE_ASSISTANT_ENABLED=true.
Run both processes with one command:
VITE_GENIE_ASSISTANT_ENABLED=true pnpm dev
pnpm dev starts the Vite dev server in its default (local) mode and the backend in parallel. You can also run them in two terminals. In the first, start the backend on http://127.0.0.1:8787 (WebSocket at /ws):
pnpm dev:backend
In the second, start the frontend:
VITE_GENIE_ASSISTANT_ENABLED=true pnpm --filter standalone dev
Open the URL that Vite prints. The dev server asks for port 3000 and moves to the next free port if 3000 is taken. In local mode the frontend connects to ws://localhost:8787/ws and uses the same backend for project data.
The backend does not watch for file changes. Restart pnpm dev:backend (or pnpm dev) after editing anything under packages/backend-core or apps/backend.
Do not use pnpm dev:web for this option. That script starts Vite in web mode, which is the cloud configuration: project data goes to a cloud project API and the assistant stays off.
Option C: browser-only (cloud mode) with the local cloud simulator
Cloud mode is the configuration used for the hosted web build: projects and browser state are stored through a project REST API, and there is no assistant. For development, the project API is provided by genie-local-cloud, a separate checkout that must sit next to the genie/ folder.
Start the simulator and the web app together:
pnpm dev:web-cloud
This runs genie-local-cloud with simulated latency (800 ms plus up to 400 ms of random jitter) and vite --mode web. The Vite dev server proxies /api/cloud to the simulator on http://localhost:8790.
To run them separately, or without simulated latency, start the simulator on port 8790 with pnpm dev:local-cloud and Vite in web (cloud) mode with pnpm dev:web:
pnpm dev:local-cloud
pnpm dev:web
The simulator does not verify sign-in: requests without a bearer token are treated as one local user. In this mode, analysis routes redirect to Genome mode and the home page reads "Create a project, choose a genome, and browse cloud-synced tracks." See Desktop and cloud.
First steps
These steps assume the assistant is on (Option A or B).
1. Create a project and pick a genome
On the home page, select Create project, enter a name (the placeholder reads "e.g. BRCA1 variant analysis") and choose a genome in the picker ("Please select a genome", with a "Search for a genome..." box). The picker lists 57 assemblies in 30 species groups. A project's genome is fixed when you create it; to work on another assembly, create another project.
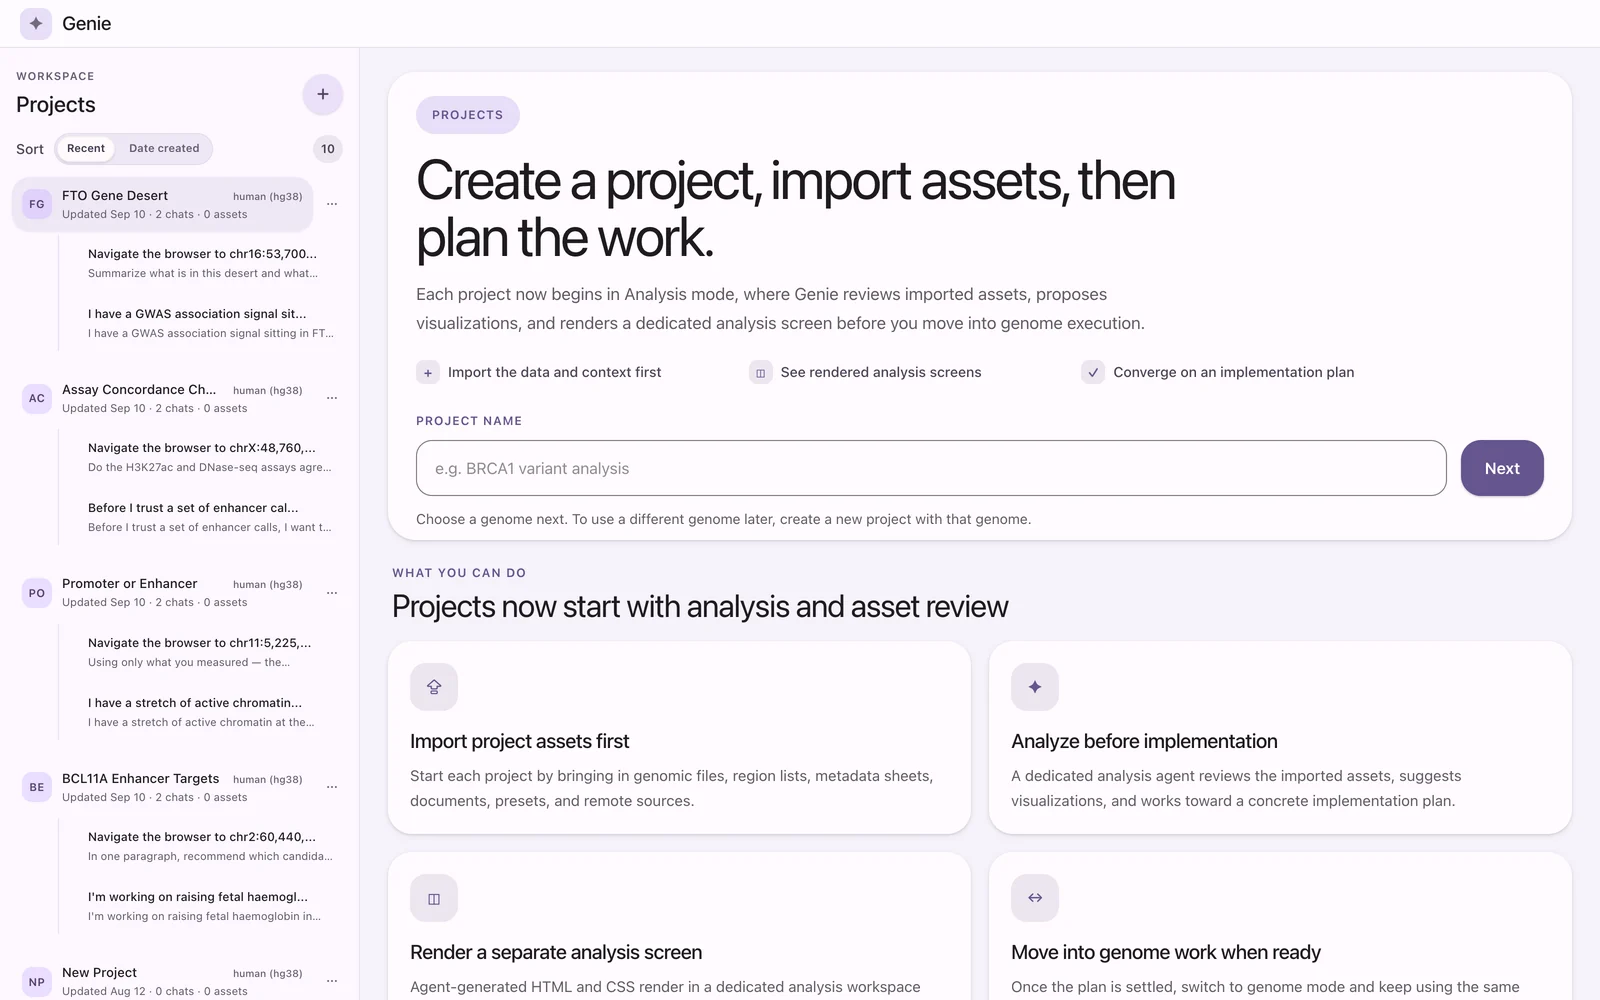
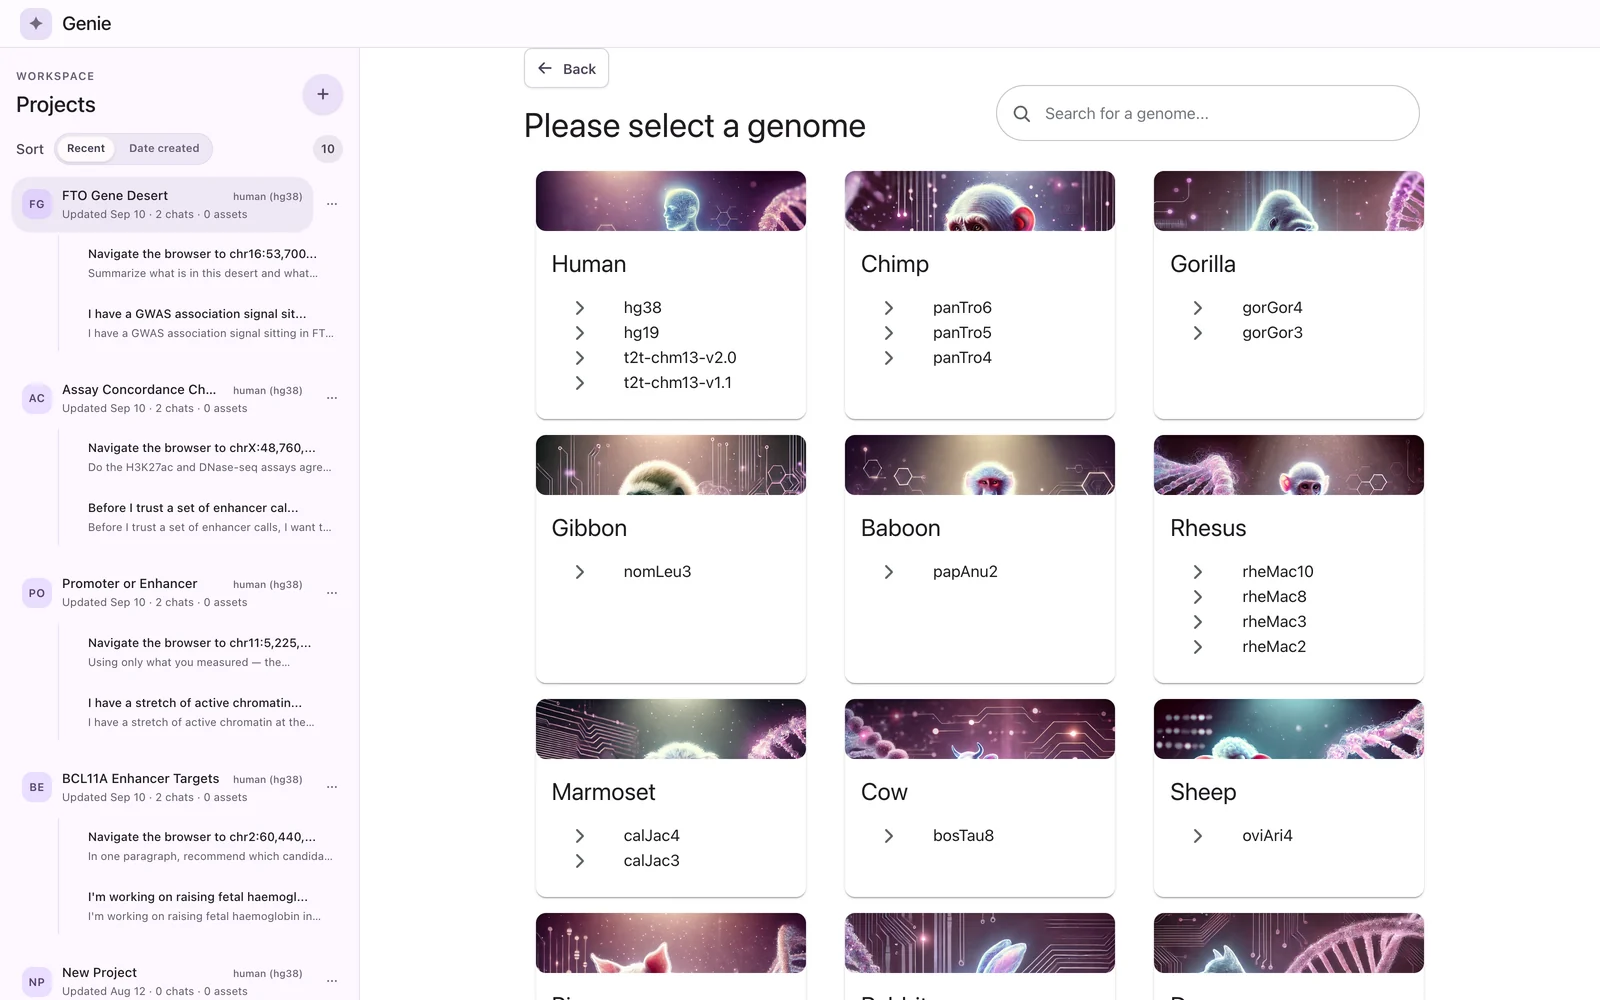
With the assistant on, a new project opens in Analysis mode, where you import project assets and save plans. To see the genome browser, switch to Genome mode with View → Switch to Genome Mode or Cmd+2 (Cmd is Command on macOS and Ctrl elsewhere).
2. Look at the default tracks
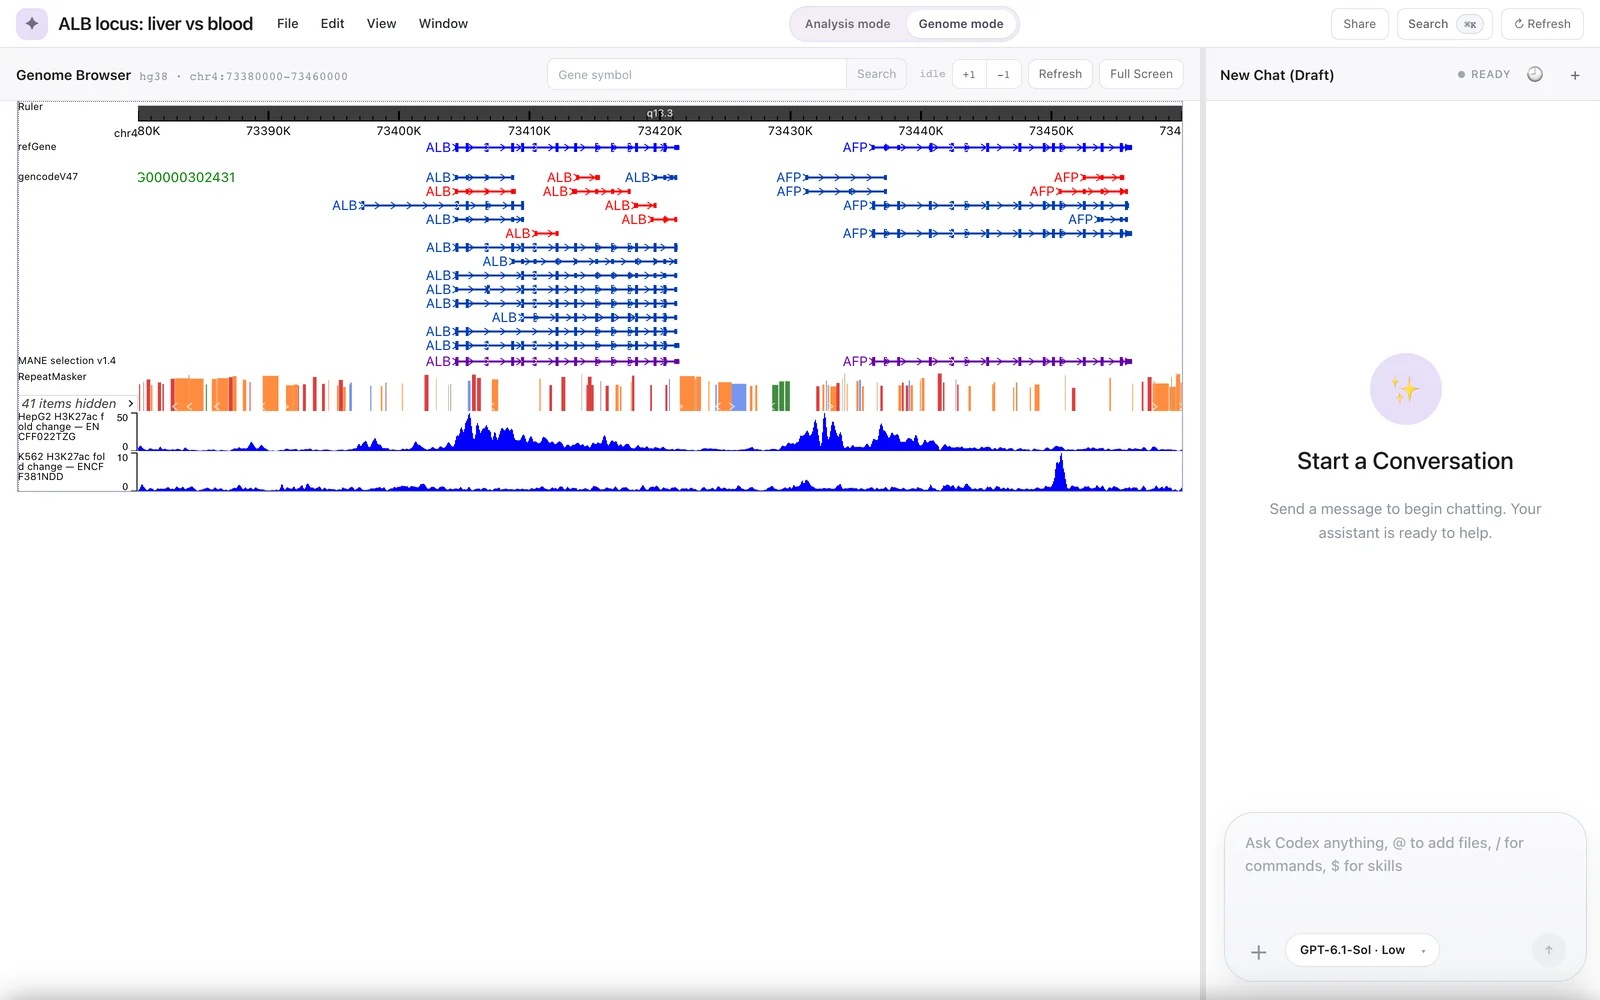
For hg38 the browser opens at the HOXA locus with a ruler, refGene, gencodeV47, "MANE selection v1.4" and RepeatMasker tracks.
3. Add a track
You can add tracks yourself or ask the assistant to do it:
- File → Open Public Data Hubs… lists tracks from the public hubs for your genome.
- File → Open Remote Tracks… adds a track from a file URL (for example a bigWig).
- File → Open Track Manager… (Cmd+Alt+T) shows, reorders, hides and removes tracks.
See Adding tracks.
4. Ask the assistant a step-by-step request
Open the chat panel in Genome mode. The composer placeholder reads "Ask Codex anything, @ to add files, / for commands, $ for skills". Pick a model and reasoning effort in the model picker, then send one plain-English request at a time.
The MYC demonstration session shown in these docs used these five requests on an hg38 project:
- "Navigate to chr8:127,700,000-127,760,000."
- "Find public H3K27ac ChIP-seq fold-change signal for K562 on hg38 and load the best match."
- "Describe what is visible in the viewport, with numbers."
- "Call peaks on the K562 H3K27ac track across the current view and save them as a new track."
- "Summarize what we found in a short paragraph, citing each claim, and propose one testable next hypothesis."
Each request makes the agent call Genie tools: navigation, an ENCODE search, a track load, a viewport summary and a threshold peak call. Tool calls appear as cards in the chat. When a tool changes the browser (navigation, adding a track, calling peaks), the browser panel reloads its state.
Claims that cite a tool result end with numbered chips. Selecting a chip opens the evidence panel with the stored evidence record.
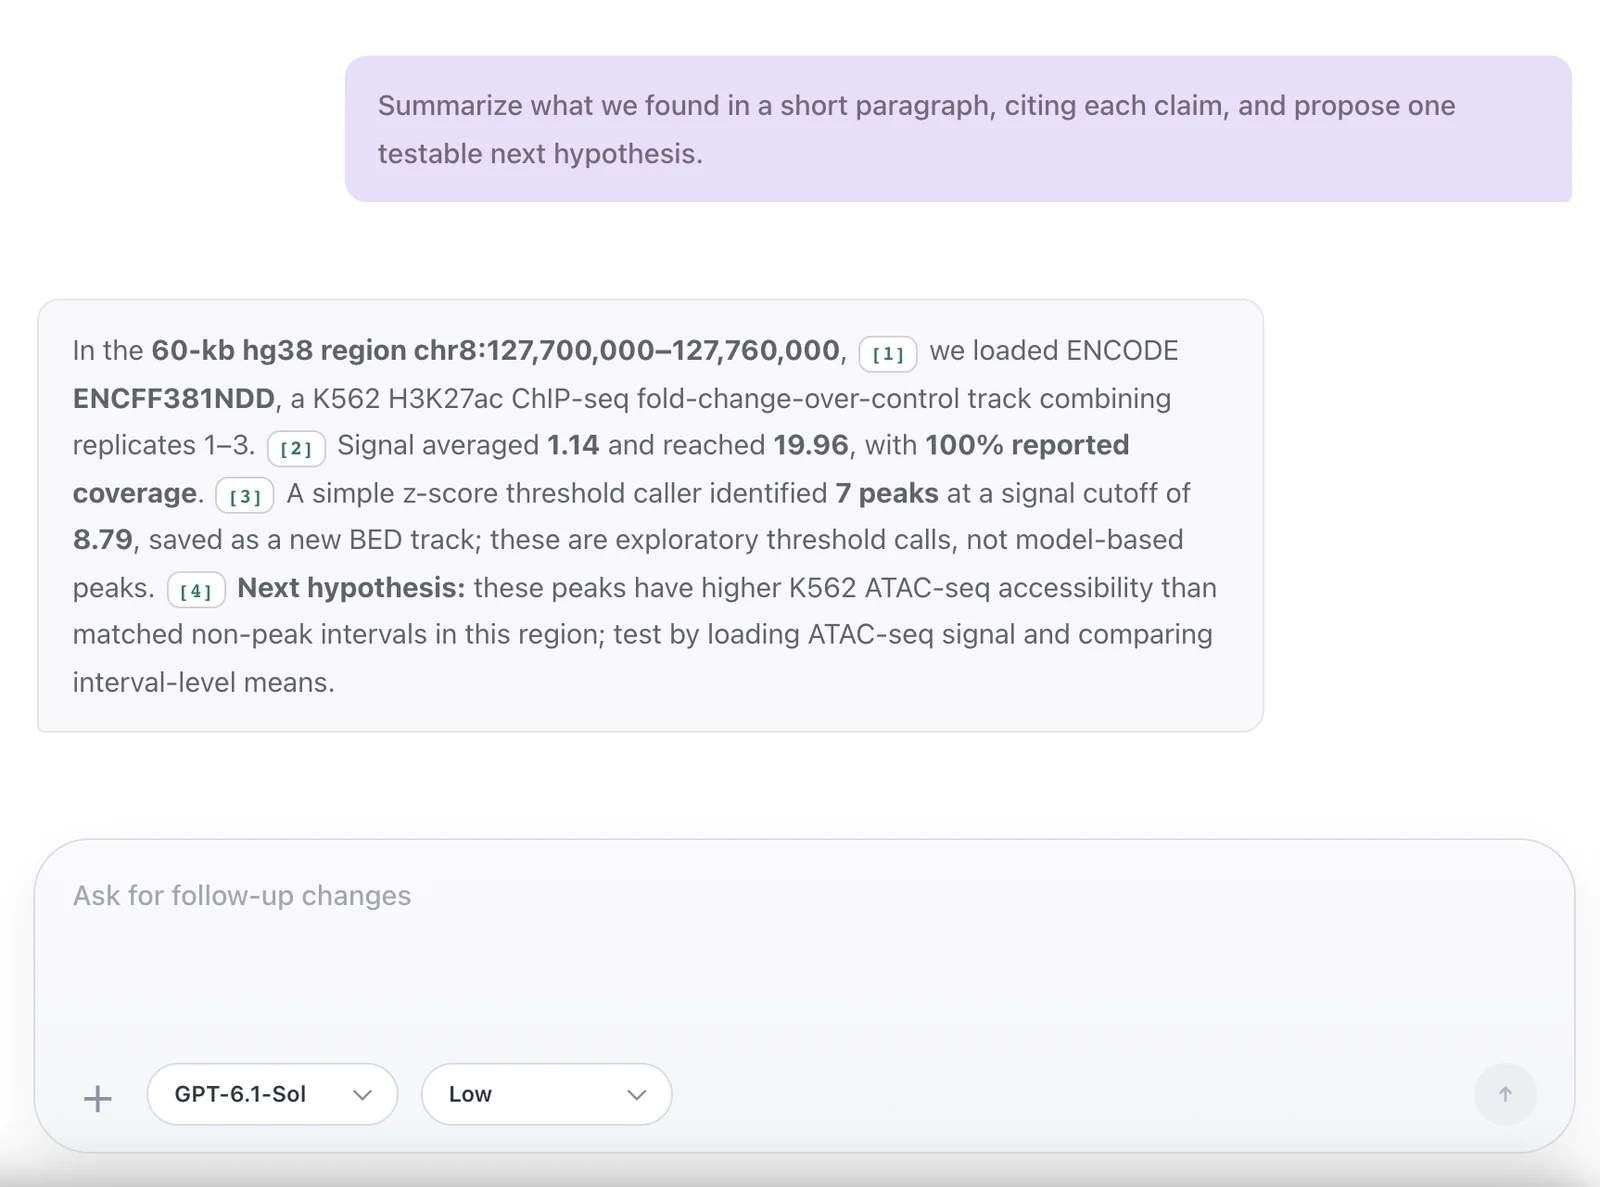
The final answer in the MYC demonstration, with citation chips after the cited claims.
A citation chip shows which stored record a claim points to. It does not show that the sentence is correct. ENCODE search results come from the live portal and can change over time. The peak tool is a simple threshold caller: its "peak count" is a count of fragments, and several fragments can belong to one region. In earlier testing, the peak BED track that the tool adds did not draw in the browser panel; the BED file is still written to the project's results folder. See Limitations.
For what the assistant can and cannot do, see the Assistant overview and the Workspace tour.
Where your data is stored
| How you run Genie | Location |
|---|---|
Local web app (pnpm dev, pnpm dev:backend) | genie/session-data/, or the folder set by GENIE_SESSION_DATA_ROOT |
| Desktop app | session-data/ inside Electron's user-data folder for the app |
| Cloud mode with the simulator | genie-local-cloud/.local-cloud/ (dynamodb/single-table.json and s3/objects/), or GENIE_LOCAL_CLOUD_DATA_ROOT |
| Hosted cloud build | DynamoDB table and S3 bucket created by the CDK stack |
In the backend folder layout, each project has its own folder under projects/<projectId>/ with the browser state (genome/browser-state.json), result files (genome/results/), assets, Analysis-mode outputs and one folder per chat session. Each chat folder holds citations.json and the app-server log app-server.log. See Backend reference for the full layout.
Chat history is held by the Codex CLI's own thread store and replayed through the app-server when you reopen a chat. Genie keeps the thread id, the citation records and the log.
Next steps
- Workspace tour: the panels, menus and modes.
- Assistant overview: how the agent uses tools and citations.
- Configuration reference: environment variables, runtime config and ports.